Cerca nel blog/Find in the blog

Visualizzazione post con etichetta DIY. Mostra tutti i post

martedì 8 ottobre 2013

How to: DIY decore your sketch books


You see it is a cheap sketch book but you can make it more creative and cool in 4 simple steps:
1. Choose some cute imagines
2. Create your collage with Photoshop or a programme that you like
3. Stamp your picture (with the mesurament of you page)
4. Use a spray glue to attach it to the front page

If you want some inspiration here you can find it:


martedì 25 giugno 2013

DIY Green Tea Mask/Scrub

Hei hei today: beauty DIY
for this mask you gonna need:
- green tea bangs (already used)
- honey
- rice flour
- cleanser

First drink your green tea then wait that the bags dry a little bet.
Pour the crash lives that are in the bags in a little boal and add 1 tablespoon of honey and 1 tablespoon of rice flour if you want to use the misture as a mask  pour it on your face with alittle scrubbing motion and let sit for 5 minutes if you want to use the misture as a scrub ad a little bet of your cleanser to make it less sticky.
After the scrub/mask your skin will be a little bet red but don't worry it's really normal just rinse it with warm water and dray with a towel and don't forget to apply your mousturizer
(the skin will absorb a lot more)

and that's it don't worry couse I will come back with another post very soon.

DIY Knot Tank Top

Hei hei fashion lovers I'am back with another super simple DIY to change your boring tee in to a beautiful knot top.


You're gonna need:
- a top
- a pair of scissors
- your hands :)))


All you gonna do is cut a little piece right in the front of you shirt (only in the front)
and then combine in a knot the two pieces and voualaaa  SUPER SIMPLE right :))

mercoledì 18 luglio 2012

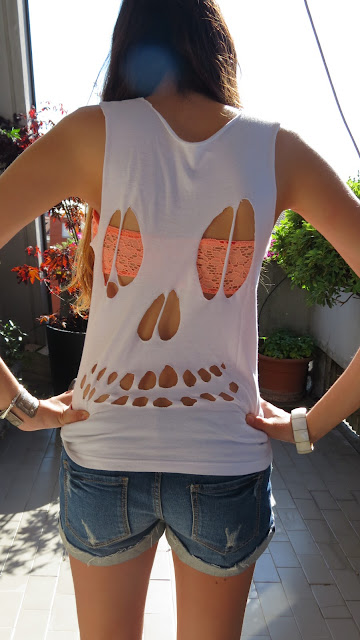
DIY Skull cut out Shirt


Purtroppo non sono riuscita a fare delle foto del procedimento
ma è semplicissimo dovete solo disegnare occhi, naso e bocca e poi tagliarli !!!


These is the shirt that I create It's supersimple !!
Draw and cut the eyes the nose and the mouth !!!

lunedì 16 luglio 2012

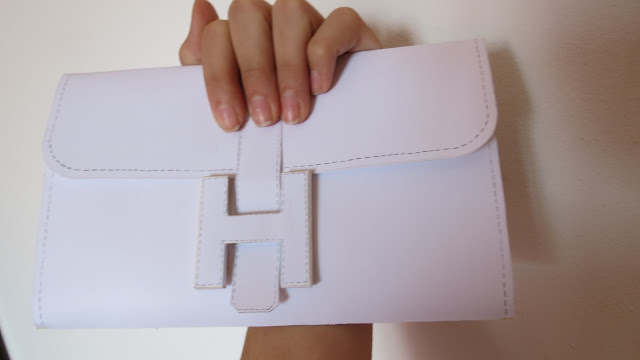
Hermes DIY Paper Clutch

Questa è la foto della borsa sul sito
Here's the bag on the site
Questi sono i fogli che dovrete stampare (su cartoncino più o meno spesso) ritagliare e incollare!!
Here's the things that you have to print, cut and glue!!!!


Questa è la mia borsa !!!
Here's my little Paper Clutch!!!


Clicca qui per andare alla schermata con tutte le borse poi clicca ' la voglio ' e scarica e stampa il PDF !!

Click here for the page with all the bag then click ' I want it  ' for the PDF !!!!

             Happy Hermes Paper Clutch!!!!!

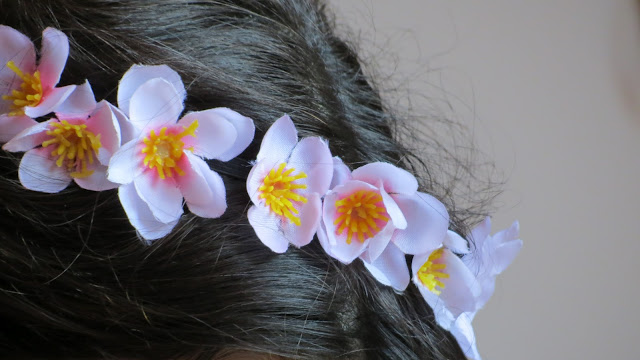
Flower Crown


Cosa vi serve ?
-Filo elastico
-Fil di ferro
-Pinze
-Fiori finti
-Colla

Il procedimento è semplicissimo basta seguire le immagini, spero che vi piaccia e se ne fate una inviatela alla mia e-mail !!! Amerei vedere le vostre foto, se volete inviatemi i vostri DIY mi piacerebbe tanto farene un post!!


What you need?
-Elastic thread
-Wire
-Pliers
-Fake flowers
-Super glue

The process is super easy, I hope you like it, if you do one take a pic and send it here !!!!
I love see your DIY If you want send your DIY photo becouse I wanna create a post with this !!!


venerdì 13 luglio 2012

New Shorts

FROM Unwanted Pants TO Beautiful Shorts


 Cosa serve ?
-ago e filo nero
-riga
-matita bianca
-forbici
-pantaloni
-filo di pelle (per la decorazione)

What you need?
-black wire and needle
-ruller
-white pencil
-scissors
-unwanted pants ( not shorts like in the photo)
-leather cord for the braide


 The Braid
Original by linkoffashion

giovedì 5 luglio 2012

The Blue Ring-Bracelet


What you need?
-filo
-pietra
-moschettone
-anellino
-catena

La prima cosa che dovete fare è girare il filo intorno alla perla in modo che si fissi e fare due asole per attaccarlo al braccialetto.
Poi fate un braccialetto e un anello con le vostre misure ( fate l'anello leggermente più grande )
A questo punto bisogna aggiungere le catene che vanno nel mezzo del nostro braccialetto ( fate sempre misure piccole )


                                                                         Inspirazione:


venerdì 29 giugno 2012

Beaded Braided Bracelet

What you need?
-filo
-perline
-un bottone


Spero vi sia piciuto si può fare in tantissimi colori !!

venerdì 22 giugno 2012

My Goal List

Ecco come creare la lista di quello che voglio fare questa settimana !!

What you need?
- post it
- pennarello nero
- righello
- fil di ferro
- scotch


Dovrete prendere le misure dei vostri post it io ne ho messi sei per i giorni della settimana ma potete anche metterne di meno o di più.
Potete decidere se mettere this week o this month.
Per attaccarlo al muro ho preso un filo di rame e l'ho incollato dietro con lo scotch, poi si può attaccare al muro con un chiodo !!!!!!!!!!!!!!!

The Love Necklace

What you need?
- fil di ferro
- catena
- pinza
- super colla
- filo rosso spesso (o di altri colori)
- charms (io non li ho usati)


Cosa bisogna fare?
1 fare una piccola asola con il fil di ferro
2 attaccare con la colla di filo rosso e poi iniziare a ruotarlo intorno al fil di ferro dopo incominciare a creare la forma delle lettere
3 alla fine incollate il filo e tagliatelo poi fate un'altra piccola asola
4 aggiustate la vostra parola, io ho aggiustato un pò la e, rendendola più grande !!! poi dovete solo attaccare la catena !!!

giovedì 21 giugno 2012

The Change Necklace - DIY


                                                Ecco diversi stili che ppotrete ottenere con questa collana flessibile!!!!!


Vi servono queste perline cilindriche, del filo flessibile e un pò di catena.
Dovete solo fare passare il filo tra le perline e fare alle due estremità delle asole e poi attaccarci la catena !!!!

Ear cuff (Mr Kate ispired)


è molto semplice farlo bisogna solo farlo secondo la propria misura; è ispirato a quelòlo di Mr Kate che tra l'altro è anche molto costoso eccolo qui :


Io ho voluto dare un mio tocco, infatti il mio è molto diverso
 prendete spunto anche voi e create il vostro unico ear cuff !
Se non sapete come indossarlo cliccate  qui !!!